-

- 6″ or greater header

-
- 1.25″ space to attach to vertical posts

-
- Commercial egress

-
- Stone and wood pillars require curtain cutouts.

-
- Non-flush headers and columns create air gaps and a non flush appearance.

-
- Crowns & accents will require curtain cutouts and reduce curtain panel functionality

-
- Avoid attaching speakers or lighting to headers.

-
- Open gables are not suitable for our enclosure system.

-
- Avoid placing outlet boxes, conduit, gas lines… in curtain attachment areas.

Porch Design and Build Recommendations for attaching PES Enclosure Panels
Things to consider:
- Mounting Space and Header Beam: To properly accommodate PES enclosure panels, we recommend having a large mounting space (“header”) above your porch. Utilize a minimum 6″ header beam that allows the curtains to be tucked behind it without hanging down into the opening. Ensure the header beam is flush with vertical supports spaced out at 8-10 ft centers.
- Track Mounting and Spacing: For convenient installation, the tracks can be mounted next to downspouts, requiring only a 1.25″ space to attach our track on a post.
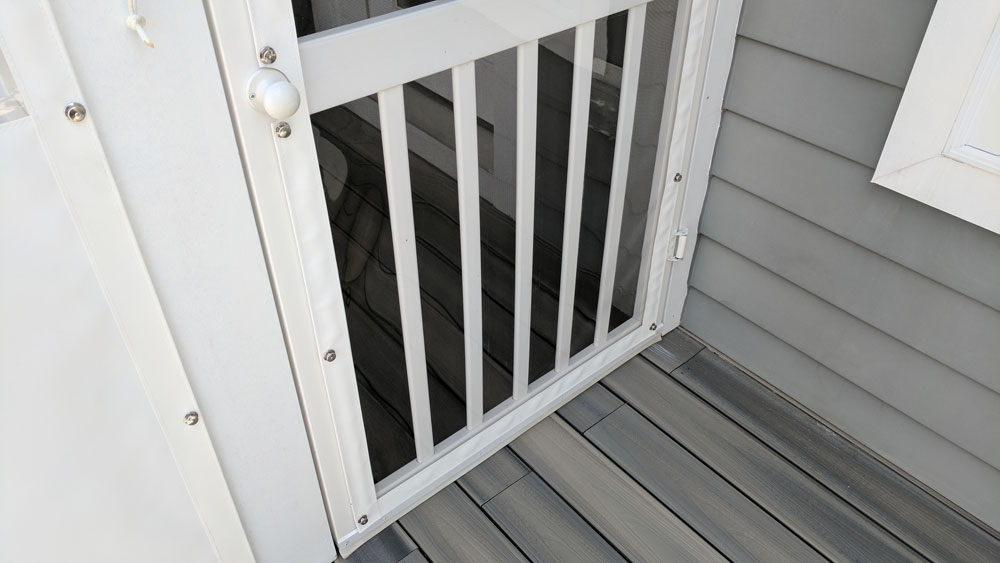
- Fire Code Compliance: If you are using the enclosure panels for commercial purposes, it is essential to comply with the fire code regulations specific to your state and county. Make sure to frame doorways for egress as required. Refer to the attached photo in the email for reference.
- Handling Interior Corners: When dealing with interior corners where two curtains meet, it is essential to consider that once rolled, the curtains may not align at the same height. In such cases, adjustments might be required, with one curtain rolled higher than the other. Alternatively, you can explore the following solutions:
- Placement of corner post. When designing a porch, it is common for the corner of the porch and the corner of the corner post to align at the corner. However, in some cases, an alternative design approach involves positioning the corner post in a way that it shares a side of the porch rather than meeting directly at the corner. Designing your corners this way allows some separation between your two curtains, rather than having them meet so closely in the corner (see the photo below).
- Mount one of the two corner curtains on the outside of your porch.
- Surface Attachments: While a flat surface is preferred for attaching the enclosure panels, PES can accommodate pillars and trim if needed. However, please be aware that these additions may impact the curtain’s performance in adverse weather conditions. Review the provided images for examples.


Avoid the following:
- Placing Heaters and Fireplaces Too Close to Your PES: Ensure that heaters and fireplaces are positioned at least 3 feet away from the curtains to prevent any potential hazards.
- Large Spans without Vertical Support: For widths exceeding 12 feet, it is crucial to incorporate vertical support to maintain structural integrity. Avoid large spans without appropriate vertical supports.
- Decorative Trim: Avoid using decorative trim, such as crowns and accents, at the tops and bottoms of your vertical supports / anywhere your curtains will sit. Decorative trim may interfere with the functionality of the enclosure panels. Remove any existing trim that may obstruct proper installation.
Crowns & accents will require curtain cutouts and reduce curtain panel functionality
- Speaker and Lighting Placement: Avoid installing speakers or lighting in close proximity to the curtain attachment areas, as this may impact the functionality and aesthetics of the enclosure panels.
- Open Gables: Open gables may not be suitable for the curtain system. Avoid incorporating open gables into your porch design to ensure optimal performance.
Open gables are not suitable for our enclosure system.
- Even / Level Block or Stone Work: Ensure that the block or stone work where the curtains will be attached is even and level. Uneven surfaces may hinder proper installation and functionality.
- Obstructed Attachment Areas: Avoid placing outlet boxes, conduit gas lines, or any other elements that may interfere with the curtain attachment areas. Ensure a clear and obstruction-free space for smooth installation and usage of your PES.
Avoid placing outlet boxes, conduit, gas lines… in curtain attachment areas.


By following these recommendations and avoiding potential issues, you can effectively design and build your porch to accommodate PES enclosure panels. Should you have any further inquiries, please feel free to reach out to us for assistance.
-
- Curtains with Roll Straps.

-
- Stays partially zipped for faster deployment.

-
- Rolled down & up, side by side.

-
- Left side rolled up.
-
- Door panel rolled up.

-
- Easy to hide.

hi
-
- Panel attaches to the floor mount via an adjustable attachment point. Simply pull the strap to snug your curtain to the floor.


-
- Optional floor mounting straps.

-
- This center opening is enclosed with 3 panels, with a door panel in the middle. Simply roll up the door panel and the side panels remain securely attached to the floor.


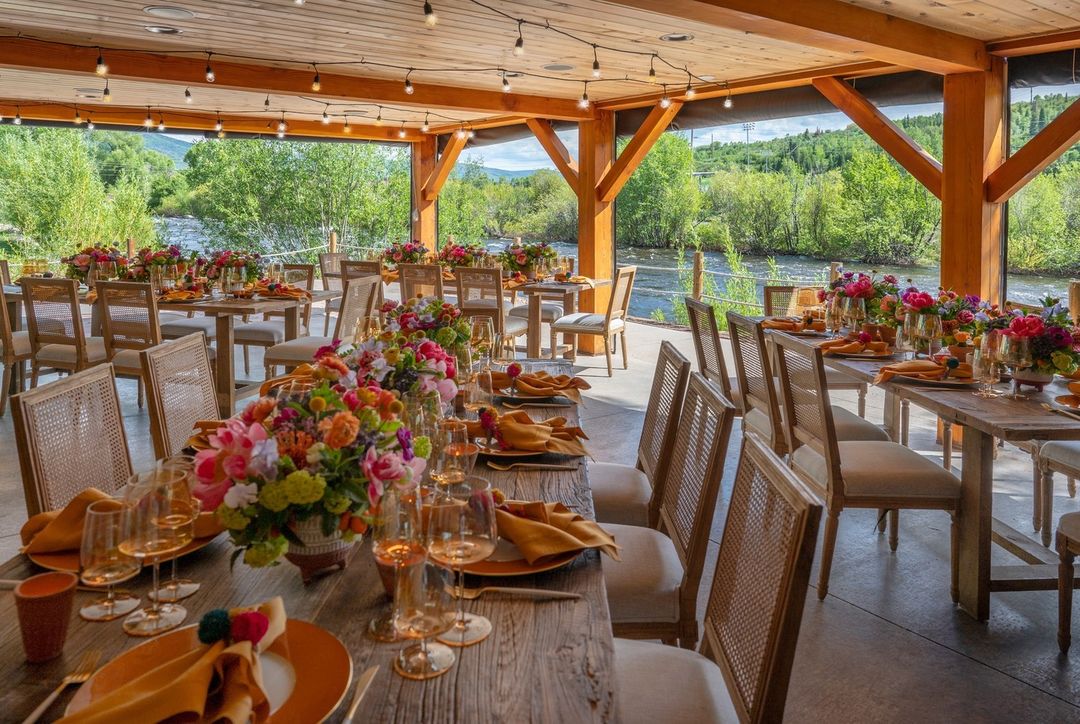
Restaurant covered patio enclosures by Porch Enclosure Systems create an attractive dining or mingling area. The panels can be raised and lowered by anyone in minutes, giving you flexibility with your restaurant or venue’s configuration. PES customers enjoy the best of both worlds, their existing patio in good weather, and complete weatherproofing from rain, wind, snow, pollen, and dust when needed. This is a configuration used for homeowners across the nation, too. Your PES can easily be deployed last minute and offers seasonal winterizing protection of your covered patio.
-
- Installation.

-
- The same restaurant after installation.
-
- Oversized enclosure panels.
-
- We offer 2 & 3 panel curtains, where panels can serve as a door opening.

-
- “In-Frame” curtain mounting.

-
- Optional floor mounting straps.
-
- Curtain cut-outs around column’s stone pedestals.

-
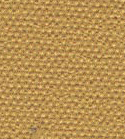
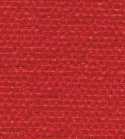
- Attractive fabric & colors.

-
- We pride ourselves on building made to last systems.


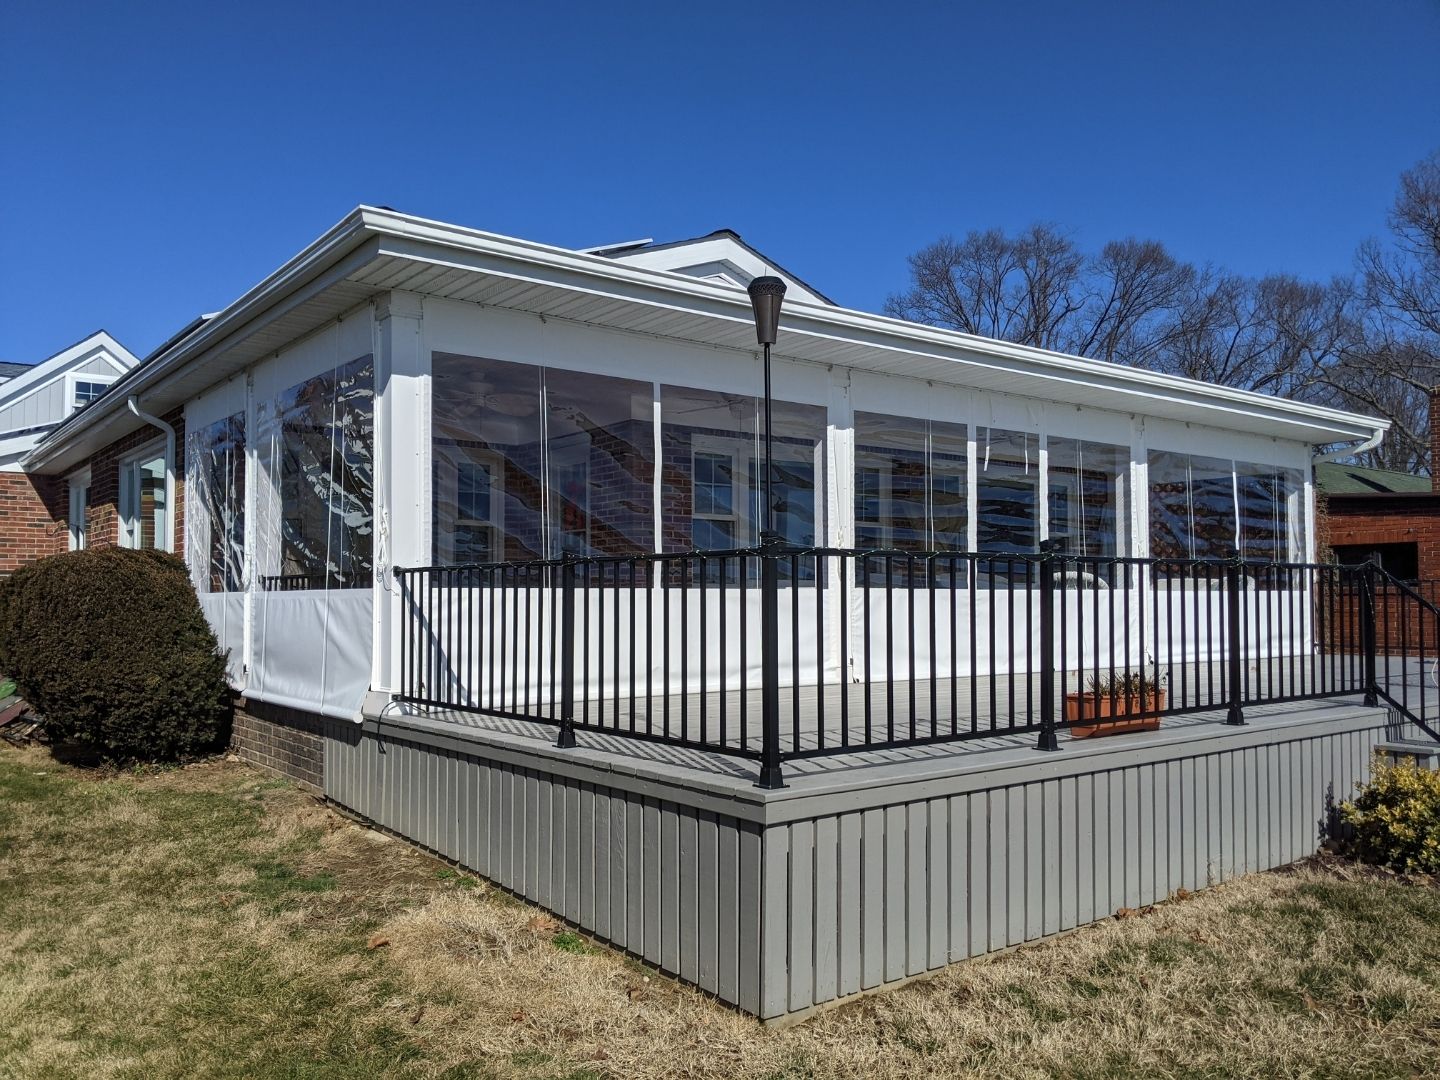
 PES enclosures fit most architectural styles and screening systems in both residential & commercial applications. We work closely with builders, contractors, HOAs, local handymen and homeowners. This assures PES customers enjoy the best of both worlds, their existing screened in porch in good weather, and complete weatherproofing from rain, HEAVY WIND, snow, pollen and dust when they need it.
Your PES can easily be deployed last minute and can offer seasonal winterizing protection of your screened porch.
-
- Interior mounted.

-
- Exterior mounted. 3 Panels cover the 7 visible openings.
-
- Customer keeps this system down 6 months of the year. Opens on 2 panels to control temperature.

-
- Porch Enclosure Systems clear vinyl & canvas curtains.
-
- A simple, yet strong design.

-
- Complimenting a PES with a storm door is common.

-
- The perfect pool house enclosure. PES door panels.

-
- Loved by Sailors.

-
- “Changed the way we use our outdoor space.”

-
- DIY Install

-
- Plants love it.

-
- More time outdoors.

Porch Enclosure Systems are your poolhouse’s best friend! We will custom-build an enclosure that allows you to continue to enjoy your poolhouse, no matter the weather. PES works with most architectural styles, allowing you to enjoy your poolhouse in good weather, and complete weatherproofing from rain, heavy wind, snow, pollen, and dust when needed. Your PES can easily be deployed for those last-minute summer thunderstorms and offers seasonal winterization of your poolhouse.
“35-50 mph gusts sustained today due to Cristobal coming through Illinois. Storm cells with down burst of 60mph+ which took down part of this 35ft tree in the background.
Just Installed the system on Saturday. And it performed!!! Turned out I didn’t need the bricks. Thanks again for all your help and guidance.
Clayton Stivers”


Porch Enclosure Systems are a game-changer for your gazebo! We will custom-build an enclosure that allows you to continue to enjoy your gazebo, no matter the weather. PES works with most architectural styles, allowing you to enjoy your gazebo in good weather, and offers complete weatherproofing from rain, heavy wind, snow, pollen, and dust when needed. Your PES can easily be deployed for those last-minute summer thunderstorms and offers seasonal winterization of your gazebo.
-
- Many attractive colors.

-
- Stain & Mildew Resistant.

-
- One panel can attractive cover multiple openings.

-
- Easy DIY project.

-
- Rolls away.

-
- Heavy weather protection.

-
- Extend use.

-
- Rolled up vs. down.

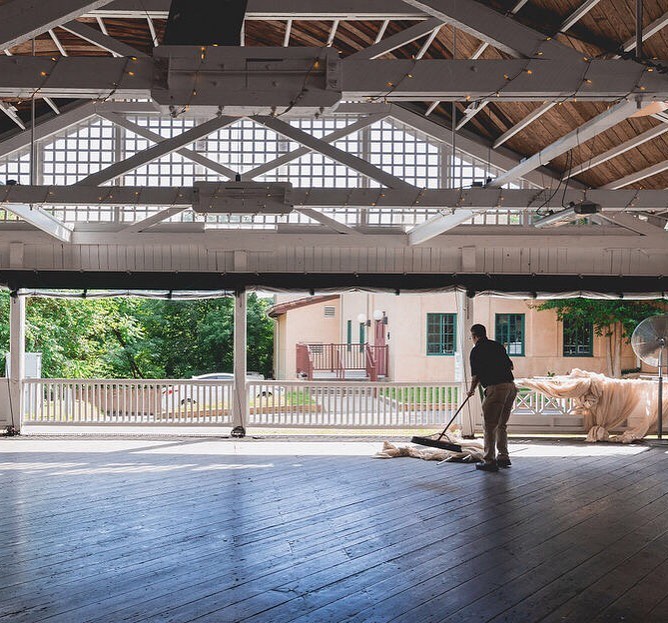
Trust your pavilion enclosure to the experts! Porch Enclosure Systems can custom-enclose most pavilions, making them available for year-round use. Our customers tell us they can now host more events, even weddings, even in unpredictable weather. Their pavilion functions just like an outdoor tent and offers complete weatherproofing from rain, heavy wind, snow, pollen, and dust. Your PES can be easily deployed when needed and makes setting up before and cleaning up after special events a breeze.
-
- Compliments any space.


-
- Optional built in door panels.

-
- Easy to hide.
-
- Many attractive colors.


-
- No job is too big.

-
- Curtains with Roll Straps.
PES now offers our bestselling commercial track and zipper mounting to residential customers. It provides you with a full top to bottom side seal. All curtains zip and unzip from side tracks as shown. Available in PVC or aluminum.
-
- Protects your porch.

-
- Snug fit.

-
- Highest quality roll vinyl.

-
- Weather resistant design and zippers.
-
- Easy to mount to narrow posts.

-
- Tie of cleats.

-
- Easy to use zippers

-
- Extend use.
-
- Rolled Up
PES now offers our bestselling commercial track and zipper mounting to residential customers. It provides you with a full top to bottom side seal and can be mounted to the interior of your structure, the solution for second story enclosures. All curtains zip and unzip from side tracks as shown. Available in PVC or aluminum.


The goal behind each PES system is to block the weather, pollen and dust from entering your outdoor space. Our most popular option attaches to your porch using YKK 10VISLON zippers. They are made with Delrin® plastic teeth molded to the fabric tape edges. This construction makes them strong and practically weatherproof, having been designed to resist damage from ultraviolet rays and corrosion for long term use. .
This refers to a roll up curtain that is using hardware for attachment. We need to know if there are any obstructions that would prevent a fastener on the bottom of the curtain.
Example: electrical outlet, trim boards
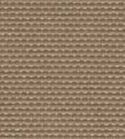
 PES fabric is an acrylic-coated 100% woven polyester (600 denier) utilizing a proprietary process to coat both the top and bottom, thus allowing the fabric to be completely reversible. It is characterized by excellent strength, durability, tear and abrasion resistance, dimensional stability, UV and mildew resistance. This fabric was originally developed to cover military vehicles in the desert, so you can be sure it will protect your porch. We describe it as super attractive, yet very durable! Did we mention is also doesn’t fray?


Avoid Mishaps, Save Time & Maintain an Attractive Look
Don’t Force It (1 of 10)
 If you have difficulty zipping down your enclosure please don’t force or use a tool such as pliers. Try alternating by zipping down each side of your enclosure a foot or two at a time.
Keep it low-maintenance! And the shine alive!

1. Polish the clear portion once or twice per year using Novus cleaner/wax included in your care kit.
2. In the fall and spring, you will be rolling your enclosure up and down more often. This is a good opportunity to polish your enclosure as it will keep debris from sticking and provide a nice shine and reduce the need to wash your enclosure prior to rolling.
Things to Avoid

AVOID MOST DETERGENTS. STICK WITH A MILD SOAP (Joy, Ivory, Dawn, 7th Generation, Dishmate, Ecover) or our Novus cleaner. Apply with a clean, soft cloth or microfiber towel to gently clean the window. Never use harsh brushes or abrasives when cleaning plastic windows. Do not use products containing silicones, ammonia, or alcohol on your plastic window, such as typical commercial vinyl care products and glass cleaners.
DO NOT RUB THE CLEAR VINYL WHEN DRY – this will scratch the window. Always flood the window with water before gently wiping it with a damp, soft cloth.
Rolling Your Enclosure

1. Make sure curtains are free of dirt & debris before rolling. Rinse off any dirt or salt build-up prior to rolling up your enclosure (hose down). For more stubborn buildup, wipe down with mild soap & microfiber towel.
2. When rolling your enclosure it is always a good idea to start by hand rolling, especially if it will be up for extended periods of time. This will help reduce wrinkling the next time your enclosure is down.
Pull Cord Mistakes

1. To avoid UV refracting in the summer sun be sure your curtains are rolled up so that the clear vinyl is encased in fabric.
2. Do not leave your curtains partially rolled up so the pull cords rest on the clear portion of the clear vinyl for extended periods of time. The clear vinyl may take on the shape of the pull cords in direct sunlight.
3. Avoid pulling and tying off the pull cord too tightly, especially if the curtain isn’t rolled smoothly.
Winter Enclosure
If you plan to keep your system down for the winter, we recommend lowering all panels when the temperature is above 60 degrees. As temperatures decrease you may have some difficulty fastening your enclosure.
Cold Weather

Once the thermometer starts dropping and the crisp fall air sets in, you may experience difficulty closing your system. This is normal! The clear vinyl is getting tighter due to the cooler temps. We recommend using a Portable Forced Air Propane Heater. Having one of these in your maintenance kit is highly recommended. Blowing the heated air across the curtain will allow the curtain to relax and make securing your curtain easy. It works best with 2 people, one to hold the heater and the other to secure the curtains. Be sure to keep the heater 2-3 feet away and slowly move from side to side to ensure a uniform heat.
Freezing Temperatures
![]()
Avoid rolling up any portion of your PES with clear vinyl when temperatures are below freezing. While the clear vinyl has been tested to withstand flexing in sub-zero temperatures, this may reduce the longevity of your clear vinyl and fastening may prove difficult.
Inside Mounted Systems

Caring for an inside-mounted PES requires a bit more time. You can hose down through your screen from outside. To wipe down, you’ll need to detach it from vertical supports (either self-locking fasteners or zippers) and wipe with a shammy cloth and some mild detergent.
For quick maintenance of an inside-mounted PES, two people can clean it together. Wet & wipe down the inside manually with a soft shammy / cloth. To clean the outside-facing section, have one person gradually roll the panel up while the other uses a shammy to wipe down the back, section by section.
Wind Problems

1. A sure way to destroy your enclosure is to roll your system down and then forget to fasten it prior to heavy winds. Always secure your curtains when partially or fully down.
2. When sustained winds above 50-60 MPH are expected (a hurricane is in the forecast), you should strongly consider rolling up your panels – with all panels up. Contact PES for recommendations based on your unique system
After making your down payment Stripe may store your credit card to use later for paying your final / remaining balance. This may make it look like our system will now allow you to change your billing method. But you can change your payment method by doing the follow.
 Start by entering your email address. After entering your email address you may be prompted to enter a code (that will be emailed to you) to use your stored credit card details on file. Click the box stating you didn’t receive the code and you will be prompted to enter your credit card details manually.

Click, Fill in card details manually. Enter your updated credit card information to pay your final payment using your preferred credit card.


Start by unscrewing the Phillips Head screws from the end cap on one side of your packing tubes.
If the plug is still stuck after removing the screws simply tap the side of the tube, a couple inches from the end, with a hammer to loosen.
Welcome to the PES Family. Your Porch Enclosure System is shipped pre-assembled and very simple to install. Each curtain is labeled on the back of the top track so you can easily order to the opening they’ll enclose.
Items and Tools needed:
Tools needed for installation include:
- tape measure
- cordless drill
- level
- graphite pencil
- 1/8″ drill bit
- 1/4″ socket
- Phillips head bit
- pair of scissors or knife
- lighter
- 9mm socket for hardware fasteners
- 2 ladders adequate for the height of your curtains
PES recommends having at least two people for installation, and even a third is handy for handing up drills, screws, and anything else you may need while up on the ladder. The system installs in five simple steps.
STEP 1: Mounting Side Track and Zippers
-The first thing you will want to do when installing a track and zipper mount system is to mount the side tracks of the curtain. Side tracks will mount on the face of the post using the 2” sheet metal screw and should be flush with the inside edge that you measured the width for. The rounded bead of the track should be facing towards the screen. Screw spacing is recommended to be 1” from the top and bottom end and the then spaced out every 12 inches. (Additional screws are included for if needed.)
– After the side tracks have been mounted for the curtain, find the corresponding side zippers for the opening this will be labeled with a piece of tape and also marked at the top near the zipper pull. (I.e. “AL” for Curtain A left side and “AR” for Curtain a Right side. These will slide from the top down into the track, and should have the zipper pull at the top. Facing down
STEP 2: Hanging the curtain.
-With one person on each end of the rolled up curtain, climb up to the mounting position for the curtain and slowly unroll the curtain.
-Zip each side into the side tracks 3-4 inches. This allows the curtain to fully support itself so you have full use of both hands while on ladder.
-Next Push the top track into up and into place and secure with your 2” Screws. (Do not place a 2” screws in the holes next to the ropes as these will be for pulleys)
-Next take the 2 8x 1/2” Phillips head screw and pulley down firmly on the side zipper in the side track and place a screw into the round part of the track at the bottom this well help hold the downward tension and will pull any wrinkles out of the clear vinyl. Once those are placed curtains can be zipped all the way down to enclose.
 STEP 3: Pulley system.
-The pulley kit should include the following: 1 cleat
1 single pulley, 1 1/2″ Nylon spacer, 2 Double pulleys, 2 1″ Nylon spacers, 3 1/4″ Steel washers, and
3 3″ sheet metal screws
-The pulley assembly will be
3″ screw, slide washer onto screw, next slide the pulley onto the screw and lastly the spacer, then screw that into the track hole for the pulley. The single pulley will get the ½” Nylon Spacer while the double pulleys utilize the 1” Nylon spacer.


– Pulleys order if tying off curtains on left side would be (Double pulley on the 1″ hole on left of top track, 2nd double pulley on left string, and lastly the single pulley on the right string. This would be reversed if tying strings off on right side.
– Bring the cords down the back and then up the front of the curtain, through the pulleys, and across and down to the post where you want the cleat. Single pulley will go behind the curtain come up from the bottom and through the pulley then pull it the through the inside sheave of both double pulleys. The next string which will be mounted next to a double pulley will do the same. Behind the curtain come up from underneath and it will run through the outside sheave of the doubles and hang down to the left of curtain.
 STEP 4: Tying off the pull cords.
-Once pull cords are ran and are hanging on the side the curtain this is where the cleat comes into play mount your cleat in your desired location (typically 36”-52” off the ground.) Using the 2” screws screw cleat into place.
– Take the pull cords wrap them 4-5 times around the cleat and lock them off. Trim excess cordage and use a lighter to singe the ends so strings don’t fray.

Installation of Fixed Panels & Hardware
-Identify your fixed panel and its location utilizing the 9mm and socket the provided fastener studs hold the panel in place and line it up to confirm proper fit.
-Using your graphite pencil, mark up the back of the self-locking fastener. Pull down and slightly outward on the curtain to remove all wrinkles until the material above is square/smooth. Then press down on the top of the fastener to make a mark along your vertical post or window frame. 
– Install the fastener stud directly in center of mark. The next step is to attach your self-locking screw attachment points to your porch. When mounting to wood, it’s a good idea to pre-drill the holes, but not required. Repeat until all hardware is installed for the panel
At PES we use a High quality pressed polished sheet when these sheets come in to us they are 110” x 54” once we allow for our seam allowances the max we get out of our clear vinyl is 108×53. Any curtain over 108” Will require a seam in the middle of the clear vinyl to allow for the width. This seam is standard 2” but can be custom. If the curtain cover multiple openings that equal >108 the seams can be placed on the posts to match the openings and posts of the porch itself. If the seam is not wanted we can adjust eh side cap width to avoid the seam. Keep in mind curtains over 108” in width will either need a seam in the clear (which can be hidden behind a post) or wide side caps to allow us to achieve the 108”+ width without having a seam in the clear vinyl.
with our curtains our clear vinyl height will be 53 inches maximum this can be made less but cannot be any taller. This 53” section can be placed anywhere within the height of our curtain. As a standard we recommend at least 12” of fabric at the top to allow the clear vinyl to be covered in fabric and protected while the curtains are not in use.
There are no fasteners or attachment at the bottom on our standard curtains. We have a 1 and 3/8” diameter steel bar in the pocket at the bottom of the curtain The tension being pulled by the side attachment be it Track and Zipper or Hardware plus the weight of the steal bar holds the bottom from flapping. Keep in mind a safety strap can be added to any curtain as a secondary attachment at the bottom.
What PES can attach to: Wood, Concrete, Brick, and Siding. (Screws will not be provided for attachment into brick or concrete this will need to be sourced by you.) What PES CANNOT attach to: Stucco. Some composite structures may need to have test holes drilled to ensure strong attachment.
PES ships out our systems to either be run the left or the right and it completely up to you. This decision will be made during install and is all a matter of which way the pulleys are installed.
In case of obstruction PES can do custom cutouts of any size. 1. Curtain cutouts: Curtain cutouts will measured from the top of the curtain (same place height is measured from) and from the Left or right inside edge depending on what side the cutouts needs to be on. 2. Door handle cutouts: Door handle cutouts will be measured from the top of the screen down to the top of the door handle and again from the top of the screen down to the bottom of the door handle.


When two curtains come together in a corner we have 2 options. 1. At the inside corner we have two points on attachment on the corner post utilizing the inside edge of the post will allow us to put 2 track on that post for each respective curtain. 2. The second option is to have the two curtains zip together in the corner and utilize a safety strap to keep the downward tension.
In cases where there is nothing to attach on the sides of the curtain and adding a post for attachment isn’t an option we can do what is a called a ground anchor, with ground anchors there is no side attachment on the curtain at all. The only form of attachment will be a strap at the bottom of the curtain just like the safety strap and will come with a piece of hardware that will need to be installed onto the porch of patio Itself. As this will be what is holding the curtain secure on one side it the hardware will need to be placed in sturdy area that can withstand a load. (I.e. Wood, Concrete, Brick, etc.) NO patio stones or garden stones as these can be lifted up.
When 2 curtains come together and there either isn’t attachment to a post or enough attachment room on the post we can have the two curtains zip together. This being said we do recommend a “safety strap” on these curtains which keeps the downward tension where the two curtains meet. – Incases where vent side attachment shares the same attachment posts at curtain post Velcro can be utilized in order to attach the side of the vent. Each side of the vent will have Velcro on the inside while the curtains to the left and right will have the opposite side of the Velcro to allow the vent to attach to the curtain.
For Hardware systems the minimum is a 3” this provides 1.5” overlap. A: For Track and zipper systems 1.25” as this is the width of the side tracks that will be installed for the zippers
Yes once the door is secured and zipped on each side the curtain will still roll up as one unit.
In cases where we are enclosed on all sides without a standard door. PES offers a roll up door. A roll up door is 36” wide section of a curtain that will have a zipper on each side to allow to entry and exit. This section will be unzipped and rolled by hand. It is kept up in place by 2 roll up straps that will keep that section raised to allow entry and exit. Also keep in mind the Roll up door can made custom to the width you want and can be placed anywhere within the width of the curtain itself. Once use of door is complete undo the straps zip the zippers down to secure.
When measuring for curtain height we will measure the full height from where the curtain will mount at the top all the way down to where the curtain will stop. Nothing will be added or subtracted from this height as this should be our Final build height (Including top track, the curtain itself, and the bottom bar.) We recommend installing the curtain as high as possible so when it is not in use and rolled up they will not be hanging down into the opening but rather tucked up high out of sight and out of mind.
When measuring door dimensions we will measure the width and height of the screen itself and add a border to allow for attachment directly to the door utilizing our Hardware fastener to attach. Our standard border is 2 inches but depending on attachment area. The minimum attachment area will be 1” for fixed panels. For example if our screen measures 28” wide by 68” tall we will our 2 inch border and the final build of this door panel will be 32” Wide by 72” tall. We will measure the same way for vent panels above door.
When measuring for hardware systems we measure the width while overlapping 2 inches on each side to allow for the hardware to attach into the post. The Minimum overlap for hardware will be 1.5”. (Curtains over 96” will require track and zipper mount or those curtains will not be warrantied)
While measuring for track and zipper systems we will measure just the opening of the area we are covering. The only overlap onto the post is done by the track itself.

Opened Patios often need a way to enter/exit the space. This is primarily done by splitting an opening into two smaller curtains that zip together and fasten securely to the floor in the middle. This allows each panel to be rolled up independently. For example and 10′ opening could be split into 7′ panel, and smaller 3′ panel to serve as a door.
In the photo above, a larger opening is split into 3 panels that roll up independently, with the center panel serving as a door.
We can also offer guidance on adding temporary (seasonal) or permanent posts to your spaces framework, so a traditional storm door can be added as needed to your outdoor space. This is common solution for opened patio enclosures that receive a lot of foot traffic.
-
- Optional built in door panels.
-
- We offer 2 & 3 panel curtains, where panels can serve as a door opening.
-
- Door panel rolled up.


We are helping Commercial Clients Nationwide use their outdoor spaces more often. Visit our Commercial Enclosures Page for photo, video & customer examples.

PES is the Eco-Friendly Option

Reduce Your Environmental Impact by Over 90% With PES
- Use far less building material than in a permanent enclosure or sunroom.
- We use the latest technology in high quality long lasting materials.
- Get the benefits of a 3-season room at a fraction of the cost.
- Built to last and no building permit required!
- Save time, money, and the environment while preserving a true outdoor space in your home or business.
Committed to Reducing Our Impact
- We recycle leftover panel track, roll bars, scrap metal, and PVC.
- New round shipping tubes mean more panels fit in each shipment, prevent damage in transit, and reduce waste.
- Customers can also now recycle our shipping materials!
- Technology to reduce waste: our C&C cutting machine’s auto-nesting feature saves material / time, & eliminates human error.
- We order our raw materials in bulk – reducing shipments & ensuring we have what you need on hand when you order.
Watch as Cory from the PES team demonstrates a track-to-track installation, then read our Step-by-Step Instructions, below.
Step-by-Step Instructions:
Step 1: Depending on your configuration, your PES representative will recommend mounting side track either to outside or inside of post. Video demonstrates both of these options. Cut track to desired length, so there is no extra track at top or bottom of post.
Step 2: Mount track using 2” white screws, keeping track flush to edge of post. Space screws 12” Apart.
Step 3: For simple installation, each curtain zipper in your PES kit arrives labeled alphabetically, starting with your first panel or panel “A” on the leftmost outside of your configuration. For example: “AL” would be your first panel A, left side zipper; “AR” is panel A, right side zipper.) Once track is mounted, find the corresponding zipper for the panel. Slide zipper piece into track on each side as shown.
Step 4: (1:59) Once track and zipper are in place, it is time to hang the panel. On track systems we recommend starting the zipper on each side of the panel (2:13-2:56). This centers the panel for you and also helps hold the weight while putting in the top track screws.
Step 5: (2:57-4:00) Next push top track into place and screw in with 2” mounting screws.
Step 6: Depending on what side you would like to tie the panel off (left or right), the pulleys should follow a pattern of “Single, Double, Double”, with the last double pulley dropping the string towards the cleats.
Step 7: Finish zipping panel down to the bottom on each side. Your first panel is installed! Repeat Steps 1-7 for remaining curtains.
Find this page at www.PorchEnclosures.com/ufaqs/track-track-installation-guide/
Watch as Cory from the PES team demonstrates a track-to-track installation, then read our Step-by-Step Instructions, below.
Step-by-Step Instructions:
Step 1: Depending on your configuration, your PES representative will recommend mounting side track either to outside or inside of post. Video demonstrates both of these options. Cut track to desired length, so there is no extra track at top or bottom of post.
Step 2: Mount track using 2” white screws, keeping track flush to edge of post. Space screws 12” Apart.
Step 3: For simple installation, each curtain zipper in your PES kit arrives labeled alphabetically, starting with your first panel or panel “A” on the leftmost outside of your configuration. For example: “AL” would be your first panel A, left side zipper; “AR” is panel A, right side zipper.) Once track is mounted, find the corresponding zipper for the panel. Slide zipper piece into track on each side as shown.
Step 4: (1:59) Once track and zipper are in place, it is time to hang the panel. On track systems we recommend starting the zipper on each side of the panel (2:13-2:56). This centers the panel for you and also helps hold the weight while putting in the top track screws.
Step 5: (2:57-4:00) Next push top track into place and screw in with 2” mounting screws.
Step 6: Depending on what side you would like to tie the panel off (left or right), the pulleys should follow a pattern of “Single, Double, Double”, with the last double pulley dropping the string towards the cleats.
Step 7: Finish zipping panel down to the bottom on each side. Your first panel is installed! Repeat Steps 1-7 for remaining curtains.
It’s So Easy! “Low-Maintenance” Instructions for Porch Enclosures
Say goodbye to special cleaners. All you need to clean and maintain your PES most days is a hose!
To maintain the clarity and extend the life of your PES, we recommend:
- Rinse off any dirt and salt build-up prior to rolling up your enclosure (hose down).
- For more stubborn buildup, we suggest wiping down with a mild soap & shammy.
- Keep it low-maintenance! Polish the clear portion once or twice per year using Novus cleaner/wax included in your care kit, helping to reduce any buildup. Keep that shine alive!
- Tips and requirements for extreme weather, when & how to close for the season are listed below.

Care Kit
Each of our proud new Porch Enclosure Systems owners receives a PES Care Kit with their purchase, to keep their Porch Enclosure System looking and functioning at its best. Includes:
- Novus Plastic Clean & Shine Polish #1, 2 & 3. This top-of-the-line system gently cleans your Regalite® press polished vinyl, helping maintain its glass-like clarity for the life of your Porch Enclosure System. Leaves a lustrous shine that resists fogging, repels dust, and eliminates static. Protects against smudges and scratching. Refills available on Amazon.
- Soft Shammy Cloth. The best we have found to wash, dry, and polish your Regalite® press polished vinyl. They are like a towel, chamois, and sponge all in one, extremely absorbent and can be used over and over. Machine washable and bleachable, will not scratch surfaces, and last for more than 10 years!
- Iosso EZ Snap Zipper & Snap Lubricant. The best product we have found to lubricate, waterproof, and reduce friction on snaps, zippers, hinges, and hardware. Used by the marine industry on the finest yachts, it keeps snaps from corroding and locking up and keeps zippers sliding smoothly. E-Z Snap Zipper and Snap Lubricant will not rinse away or dissipate in hot weather, and is non hazardous, containing no solvents, silicone, or Teflon. To use on a snap, simply place one drop in the head of the snap and open and close it a few times. To use on a zipper, place a drop in the middle of the zipper and work up and down a few times to distribute.
Properly securing and rolling up your enclosure
In the fall and spring, you will likely be using your enclosure more often. These are good times to polish your enclosure as it will keep debris from sticking and provide a nice shine and reduce the need to wash your enclosure prior to rolling. Things to keep in mind
- When rolling up your enclosure it is always a good idea to start by hand rolling, especially if it will be up for an extended period of time. This will help reduce wrinkling the next time your enclosure is rolled down.
- Be sure your curtains are properly fastened in the down position. One way to destroy your enclosure is to roll your system down and then forget to fasten it in heavy winds
- When sustained winds above 50-60 MPH are expected (hurricane is in the forecast), your system should be rolled entirely up – with all panels up.
- If you plan on keeping your system down for the winter, you should lower all panels before temperatures drop below 54 degrees. Once temperatures drop lower you may have additional difficulty fastening your enclosure and it may take longer than you had hoped to do so.
- Avoid rolling up curtains with clear vinyl when temperatures are below freezing. While the clear vinyl has been tested to withstand flexing in sub-zero temperatures it may reduce the longevity of your clear vinyl and fastening many prove difficult.
Fabric Protection (No Need for Valences)
Once the clear vinyl is attached to your curtains the height on the clear view is 53″. We suggest a minimum of 12″ on top so when your curtains are rolled up the clear vinyl is covered (encased) by the fabric to protect the rolled clear portion from UV refraction.
This also protects the clear portion of your panel from sitting on the lines and creating unnecessary creasing.
Do Not Use // Avoid
DO NOT USE HARSH DETERGENTS. Apply with a clean, soft cloth or microfiber towel to gently clean the window. Never use harsh brushes or abrasives when cleaning plastic windows. Do not use products containing silicones or alcohol on your plastic window, such as typical commercial vinyl care products and glass cleaners.
Do not rub the plastic window when dry as this will scratch the window. Always flood the window with water before gently wiping it with a damp, soft cloth.
Do not roll dirty curtains or you risk scratching the clear vinyl.
Do not leave your curtains partially rolled up and allow the pull cords to rest on the clear portion of the clear vinyl for extended periods or time.
To avoid UV refracting in the summer sun be sure your curtains are rolled up so that the clear vinyl is encased in fabric.
Caring for an Inside-Mounted System
Caring for an inside-mounted PES (shown in 2nd video, above) requires a bit more time. You can hose down through your screen from outside. To wipe down, you’ll need to detach it from vertical supports (either self-locking fasteners along left and right hand sides, or zippers) and wipe with a shammy cloth and some mild detergent.
For quick maintenance of an inside-mounted PES, two people can clean it together. Wet and wipe down the inside manually with a soft shammy / cloth. To clean the outside-facing section, have one person gradually roll the panel up while the other uses a shammy (soft cloth) to wipe down the back, section by section.
We are the manufacturer and we fabricate every PES right here in the USA. To keep our costs low, we ship direct to you our commercial and residential customers. By using our web-based system and a Design Consult with the fabricator, we’re able to ensure your PES will fit your unique porch’s configuration.
Most of our customers choose to DIY their porch enclosure, which is typically a one-day project for two people.

Taking measurements for a new enclosure. See how to take measurements here.
Some customers choose to hire a local handyman, or anyone who is familiar with installing porch screen systems.

Panels arrive mostly preassembled and labeled for easy install.
Tools Needed to Install Your PES
- drill with 1/4 inch driver bit
- phillips head screwdriver
- tape measure
- level
- ladder or step stool
- pencil
- cold beverages
- (no hammers needed!)
- Attaching the top of your curtain to your porch or patio’s header using our self-tapping screws
- Attaching low profile fastening screws along your vertical posts
- Attaching pulleys and tie off cleat
- Run pull cord through the pulley system
The next step in determining if a PES is right for your residence or business is to request a quote using our online system – this allows us to collaborate effectively with you from start to finish.
OUTSIDE MOUNT
Benefits of an Outside (PES Standard) Mount:
- Simple and easy installation.
- Protects more of your porch from weather, dust, and pollen.
- Can increase the longevity of your porch or patio, and makes it a very low-maintenance space.
- Any porch screens are also protected from the elements like wind, rain and from collecting dust.
- Panels will likely be completely out of view when rolled up (vs. inside mount where a roll will be visible at the top of your header).
- When the wind blows, your outside-mounted windward curtains will press against the frame of your porch, reducing tension and stress on the fabric and fasteners.
- Simpler maintenance.
INSIDE MOUNT
For porches and patios that are not at ground-level, it is often necessary to do an inside mount in order to operate your system from inside, as opposed to operating your system on the outside of your porch.
Video: rolling up an inside-mounted PES
Some porches and patios are constructed so that additional framing is available in the corners and our curtains have a flat surface to mount, making an inside mount simple. Other screen porches lack flat surfaces in the corners where curtains can mount on the inside. Customers may choose to add the lumber needed to make this happen. Or, the porch may require a track system that uses vertical zippers instead of our standard self-locking fasteners. During your Design Consult, our fabricators will help you make this decision.
Track System:

Caring for an inside-mounted PES requires a bit more time. You can hose down through your screen from outside. To wipe down, you’ll need to detach it from vertical supports (either self-locking fasteners along left and right hand sides, or zippers) and wipe with a shammy cloth and some mild detergent.
For quick maintenance of an inside-mounted PES, two people can clean it together. Wet and wipe down the inside manually with a soft shammy / cloth. To clean the outside-facing section, have one person gradually roll the panel up while the other uses a shammy (soft cloth) to wipe down the back, section by section.
Yes, we can make a fixed panel that will attach to the door using our self-locking fasteners or snaps. We also cover vent panels (for above-the-door openings) and irregularly shaped openings with snap on panels. Since these are fixed panels they WILL NOT roll up you will have to remove and store the door panel when not in use. Door panels are often the first item to be removed in the Spring and the last to go back up in Fall.
If you’re building a new screened porch, a storm door from your local hardware or big box store is also a perfect and popular option for complimenting your Porch Enclosure System.

PES Above-the-Door Vent Panel
Vent panel openings are typically covered by all clear vinyl with a 2″ fabric border (shown above) or as solid fabric (below), without the clear vinyl.
 ;
;

-
- Fixed Cover by PES for Above-the-Door (Vent) Panel
Rest assured that this happens with both DIYers and professionally installed systems. Our customers who unroll frequently in the summer don’t have this issue, since the panels are more pliable in warm temps. But when it gets cold, they can sometimes be a little trickier to button down.
Our press-polished vinyl sheet glass has a shrinkage rate of less than one-half percent – the best in the industry, which is why it’s used on the new Jeep Wrangler soft top and for many marine applications. Competing clear materials will shrink up to 5-7%, making a snug fit impossible.
Since our clear vinyl sheet glass will change shape slightly, although temporarily, with cold temperatures and after having been rolled up (wrinkles), patience is of the essence when unrolling in colder temps (below 60s).
Here are some pointers on closing your PES for the season:
– Choose a calm (non-windy) day to close for the season. If possible, wait for a warm day and/or direct sun.
– When unrolling, let panels “settle” a bit before attempting to button down fully.
– Lower the curtains and securing the top and bottom of the curtain.
– Wait until the porch has some sun or heat to help ease the tension on the curtains.


What’s the very latest it can be done in the fall and/or the earliest in the spring to avoid cold weather issues for the enclosure installation?
On average the life expectancy of our PES is 7-10 years depending on how well it is maintained.
Free of dirt and debris prior to rolling.
Be sure your clear vinyl is free of dust and debris prior to rolling up your system. This is most common when your curtains have been down for extended periods of time. While the clear vinyl does offer some scratch resistance and is denser than other clear vinyl, cleaning occasionally will seriously reduce any abrasion to your clear vinyl when rolling up your panels.
Avoid unfastened curtains in heavy wind.
When your curtains are down be sure they are fastened. Leaving a curtain unfastened in heavy wind is the easiest way to decrease the longevity of your curtain.
After iefore rolling up your system after it has been in the down position for long periods of time, it is a good idea to check that your curtains or it is a good idea to rinse or wipe down the clear vinyl from debris after your currents have been in the down position for long periods of time. While the clear vinyl does have scratch resistance built in, this will seriously reduce is the easiest way to avoid Ensuring that your curtains are rolled up and stored properly will increase the life expectancy on your system.
 Yes, outdoor heaters and fireplaces are used by many of our clients to warm up their enclosed spaces in the winter. We also recommend putting your ceiling fan in reverse if possible to help circulate the air. You may also wish to request a system using our marine grade zippers versus our standard fasteners for a more airtight fit.

-
- “Changed the way we use our outdoor space.”


-
- Attractive fabric & colors.


-
- Restaurant Patio Enclosure


When you receive your curtains and your care kit, inside the care kit is a detailed instruction manual that will include information about roll up and storage, extreme weather changes and how it will affect your system, basic cleaning, and routine maintenance.
It’s So Easy! “Low-Maintenance” Instructions for Porch Enclosures
Say goodbye to special cleaners. All you need to clean and maintain your PES most days is a hose!
To maintain the clarity and extend the life of your PES, we recommend:
- Rinse off any dirt and salt build-up prior to rolling up your enclosure (hose down).
- For more stubborn buildup, we suggest wiping down with a mild soap & shammy.
- Keep it low-maintenance! Polish the clear portion once or twice per year using Novus cleaner/wax included in your care kit, helping to reduce any buildup. Keep that shine alive!
- For tips and requirements for extreme weather, when & how to close for the season and how to clean an inside-mounted system, please contact your PES Sales Representative.

The price does not include shipping, taxes, duty or conversion to Canadian dollars. Some Canadian customers choose to have their system shipped to a U.S. address or pick up their system from a shipping terminal location within the United States.
- PES is completely out of the way when opened.
- PES is a clear press polished vinyl sheet glass, the same used on the Jeep Wrangler soft top.
- A typical PES installs outside of the screen, which protects your screens in winter.
- PES can accommodate any shape porch; most typically you don’t have to reconfigure what you love about your porch to install it.
- PES is durable and simple.
- PES is typically less expensive than a sliding track system.
- PES allows you to have your screen porch or patio back the way it was in warm months, without any obstruction to your ventilation.

This is a high quality enclosure that does its job in all sorts of weather. If you haven’t already, please take the time to get familiar with our high-quality components.
If you don’t have a header board to attach to, attaching directly to siding is not a problem as long as you have a level line to mount to, and ensure mounting screws have a good hold into stud behind the siding.
Ideally, attach to the bottom edge of siding, just below the panel projection (shown in diagram below).
*Some customers prefer to remove the siding where they plan to attach the curtain and replace it with a flat PVC board solution, creating a header.

Warranties: We do offer an 3-year limited warranty on normal wear and tear and against any manufacturing defects. We are also here to support PES customers if something does go wrong.
CLEAR VINYL
Like any window, we don’t offer a guarantee on our clear vinyl since they can be mistreated. They can also break when confronted with a hard object, especially in freezing temperatures. Curtains with clear vinyl must also be lowered and fastened prior to freezing temperatures. While our clear vinyl has been laboratory tested to withstand bending in freezing temperatures, we believe rolling in sub-freezing temps will reduce your curtain’s longevity. Curtains can also prove difficult to fasten at temps below 50 degrees. When rolling down in lower temperatures if fastening is proving difficult, please contact PES support for guidance.
HEAVY WIND
Our curtains are built to withstand bad weather, but common sense is also required to maintain your curtains longevity. For example, curtains must be fastened when in the down position to avoid them waving in the wind. Also, when the weather calls for sustained winds above 50 MPH, you need to decide how directly your enclosure will be impacted. This is especially true for oversized curtains, and panels with fewer/limited attachment points. By monitoring your enclosure in lighter winds, you should be able to predict if any of your enclosure will be overly stressed in severe weather. These portions – or the entire enclosure – will need to be rolled up. The PES team is here to assist in determining if your enclosure should be rolled up, or if additional hardware added to assist in heavy weather. Please contact us proactively with any questions about these issues, and before severe weather hits so we can assist you.
Our manufacturing process and the materials we use in each PES meet or exceed the standards commonly found in sailmaking, offshore boat enclosures, and large free standing shade sails – our knowledge comes directly from decades in the sailmaking, marine and shade sail industry. PES is rigorously tested at wind speeds up to 70 MPH, yet since each of our panels is customized to your unique space there is not certified wind rating. Our team will work with you to determine the best design to meet your space’s and climate’s specific needs. To learn more, check out how our curtains are used in extreme climates for wind protection.
Lab Test Results of our Clear Vinyl Sheet Glass
Tested for extreme cold, pressure, abrasion & UV.
Our curtains are built to withstand extreme cold, heat, and weather. The clear vinyl will shrink and expand slightly with temperature changes. The change is less than 0.5% (1/2%), far less than the standard 5-7% of most clear vinyl enclosures. Any changes in size can make fastening (closing) your enclosure in colder temperatures more challenging. We recommend keeping your enclosure down when temperatures are below 60 degrees Fahrenheit and only rolling them up to the bottom of the clear vinyl if you still like the airflow. This will assure you can use your enclosure with minimal effort.
 Our manufacturing process comes directly from many years of experience in the sailmaking industry. All of our components have been tested in extreme cold, wind (pressure), abrasion, heat and sun (UV).
Lab Test Results of our Clear Vinyl Sheet Glass
Tested for extreme cold, pressure, abrasion & UV.
Each curtain has a PVC top track that attaches over your opening. NOTE: Track is 1 1/4″ tall and available in White, Tan or Black. Curtain can be removed from the track by loosening two stainless screws and sliding left or right.
We also have a Polished Aluminum Track available, which clients choose to match with their darker colored curtains (i.e. Chocolate Brown, Forest Green, charcoal, etc.)
 Yes, your system can be installed inside. However, since some screen porches lack flat surfaces, in the corners, for our curtains to mount it may require a track to track systems that uses a vertical zippers instead of our standard fastener. Our team can help review your options.
The turnaround time can change based on seasonal demand but is usually around 21 days from the time you review and confirm your order with our fabrication team. You should also plan 3-5 business days for shipping.
Larger systems (10+ curtains) or heavily modified systems (cutouts for objects, bottom attachment) will likely push back the delivery date..
Systems that require components that we may not stock, such as some fire retardant fabrics, tinted clear vinyl, logos added to clear vinyl, or custom colors may also push back the delivery date. Feel free to speak with our team to get a firm delivery date for your specific project.
This center opening is enclosed with 3 panels, with a door panel in the middle. Simply roll up the door panel and the side panels remain securely attached to the floor.
There is no minimum or maximum on heights and widths. We can build any size you would like, however, once curtains get wider than 10-12 feet they can become difficult to roll up or even secure in windy conditions. It may require assistance to properly roll-up and secure oversized curtains. We often suggest splitting your larger opening into two smaller curtains that zip together and fasten to the floor in the middle. This adds rigidity to your system and allows you to rollup each curtain independently. We can also offer guidance on adding temporary or permanent posts to your spaces framework.


-
- The same restaurant after installation.


Yes, you may heat and cool your enclosed spaced to make it more comfortable.
 The sheet glass we use is a marine grade pressed polished product, not standard roll vinyl (extruded PVC). Our product is superior, but has limitations:
- It comes from the factory (same factory that makes the new Jeep Wrangler soft top windows) in sheets 110”x 54”. Our customers are willing to work within this size constraint, letting us know where they would like their clear “window” within each of their PES panels. Panels can be made any size! The rest of the panel is made from fabric – a high-thread count, acrylic-resin coated fabric that won’t stretch, fade, or fray / is abrasion-resistant.
Superior qualities of our press-polished vinyl sheet glass:
- Multiple sheets of standard roll-glass, placed between nickel-plated mirrors, booked & baked in an oven.
- The result: a much denser, less porous product not subject to mildewing, yellowing, oxidation, or UV damage.
- Shrinkage and expansion rate of less than one half percent.
- Same plates, same factory as the new Jeep Wrangler soft top windows.
- Unlike with other clear products, ours offers both LOOKS & LONGEVITY, giving the discerning homeowner many years of long-lasting clarity.
Problems with extruded PVC (which we do NOT use!):
- Subject to yellowing, clouding, shape instability, cracking.
- Due to shrinkage (5-7%), it must be cut oversized, so you end up with a shower curtain-like appearance. The taller the roll glass gets, the droopier it gets in warm weather.
Our manufacturing process is also superior:
- We use a computer-aided C&C cutting machine for precise cuts (no human error).
For more about our superior quality, crystal-clear vinyl sheet glass, click here.
Yes! Keeping our minimums in mind, you can specify the amount of fabric you would like at the bottom and top of your enclosure within Your Account when building your enclosure. No Account? Get started here.
![]() TOP FABRIC MINIMUM
TOP FABRIC MINIMUM
For an 8-foot tall panel, we recommend a minimum of 12” on top (includes 1.5″ PVC top track). This assures the clear vinyl is covered (encased & protected) with fabric while the curtain is rolled up. Many customers choose to attach their curtain further up on their header, often just below the eave. This reduces the amount of fabric within their viewable space and assures the curtain is out of view when rolled up.
*For shorter curtains (when your porch has a knee wall), you may opt for a less fabric on top and instead request a valance to protect your curtain when rolled up. A valance can reduce your top fabric and mounting track from 12″ to 7.5″.
 BOTTOM FABRIC MINIMUM
We also require a 4” minimum on the bottom of your curtain to contain the curtain’s roll bar (see bottom of panel to left).
Curtains will attach at the top using our PVC or Polished aluminum track screwed in the space above your opening (header) and along the vertical posts using either side mounted track or our standard marine grade fasteners. No floor mounts are required for a standard install.

PES Rolled Up
Our PVC or Aluminum Top Track measures 1.25” high. When rolled up, the diameter of the roll is about 3.5-4″. We recommend mounting it at the top of your header or just under your eave or ceiling so it’s out of view.

Mounting the PVC Top Track for an Inside-Installed PES
We recommend minimum of 12” fabric + top track at the top of each panel (minimum fabric 10.25″, since the top track is 1.25″). This assures your clear vinyl is protected and the pull cords are not resting directly on the clear vinyl when your PES is rolled up.

Side caps (fabric) are 2”. Fastener is placed ¾” in from curtain edge.
Available in white PVC or polished aluminum. Functionality is the same, choice is purely aesthetic. Those who choose darker fabric for their panels typically go with the polished aluminum.


Yes. We do offer motorized systems, but they are often cost prohibitive. For a motorized system, the price is approximately 4 times our manual roll-up enclosure. Also, the maximum overall height on a motorized curtain is 9 feet tall. – taller curtains will not fit in the storage drum when rolled up. If you would like more information on our motorized system please specify in your project notes when submitting your request.
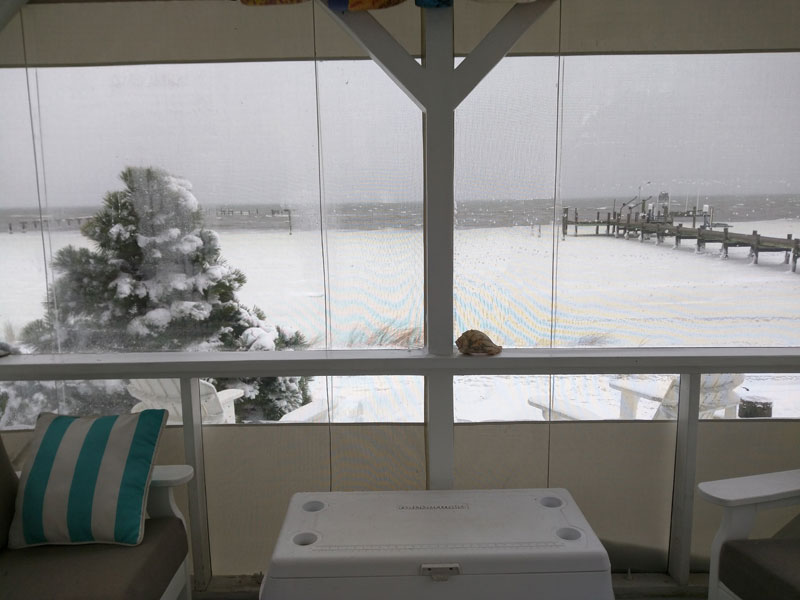
PES is very popular in the Great Lakes, the Rocky Mountains and the Northeast regions where extreme cold and heavy wind are often a concern. Our curtains are built to withstand extreme cold and wind. Even our clear vinyl has been laboratory tested for Low Temperature Flexibility @ -30 F with no cracking, and Dimensional Stability (shrinkage & expansion due to temperature change) of less than 0.5% (1/2%). Most products see significant cracking at these temperatures and shrinkage and expansion of 5-7% is common. These changes can significantly alter the look of your enclosure, the ability to fasten it in cold weather, and your enclosures longevity. While our enclosures are made to withstand extreme cold, we still recommend keeping your enclosure down when temperatures are below 55 degrees Fahrenheit and only rolling up the fabric portion of your enclosure if you still like the airflow. This will assure you can use your enclosure with minimal effort and provide many years of use for your PES enclosure.
All of our components have been tested in extreme cold and our manufacturing process comes directly from many years of experience in the sailmaking industry.
Lab Test Results of our Clear Vinyl Sheet Glass
Tested for extreme cold, pressure, abrasion & UV.
Our weighted roll bar adds rigidity to your curtains, renders floor attachments unnecessary and makes rolling your enclosure up and out of the way easy. The roll bar is made of galvanized steel, has PVC end caps and is cleanly stitched into the base of your curtains. Just above the roll bar each side is attached, with fasteners or zippers, assisting with securing your curtain in the downward position.
See the roll bar in action on an inside install here (*many of our enclosures utilized zippers, instead of fasteners as shown):
-
- 2023 Weather Resistant Enclosure Panels – freshly installed.

Our standard curtains fit snugly along the top, sides and base of your porch or patio. The top of our roll-up curtains slide into a top tracks creating a wind and waterproof seal. The sides of our curtains attach to your porch using commercial-grade waterproof zippers and weather flaps to keep out all the elements. The base of our curtains utilizes a weighted roll-bar adding both rigidity and calm to your overall system.
To learn more, check out:
With any enclosed space having a means of egress is importmant and in commerical applications necessary.
If your porch is already equipped with a screen door or storm door we offer a “Door Panel” these start at $229. These fixed panels do not roll up and attach utilizing our standard hardware directly to the door itself. This allows you to use the door as you would any other time of the year without having to unattach, unzip, or roll anything for entry and exit.
If the area you are inclosing does not have an existing door PES can do what is called a roll up door. A roll up door is a 36″ section of a curtain that you can hand roll up while leaving the rest of the curtain down and secure. This allows entry and exit of the enclosure while keeping as much of the area enclosed.
For commercial door ways a frame can be built with a storm door installed into it . This option as of now is only available for local installs done by PES Please contact your sales associate to discuss the commercial door options.
Our system will work with almost all porches or patios. In some cases customization is needed to make our enclosures work with your unique space. We may also suggest additional construction to create the idea solution. If our fabrication team recognizes that customization will be required to work in your space they will quote you for the number of hourss…
If you would like to see a PES in curtain we have two locations where they can be seen, you will need to make an appointment with a sales member in order to do so. Our original factory is located in Denton Maryland that has a 7 curtain system on the front showing different attachment styles and options we offer. In 2021 we have moved to Dover Delaware where here at this facility we showcase a commercial enclosure system that stands 14′ tall.
If you would like to see either in person please schedule with your sales associate in order to schedule a meeting to see the facility and see the curtains.
We keep our prices low by shipping straight to you from us, the manufacturer. All of our enclosures are made right here in the U.S.A. on Maryland’s Eastern Shore with high-quality components. We understand that some customers would like to see and touch the product before buying. To satisfy this, we offer a Sample Kit for $24.95. Cover the shipping and handling costs and we’ll send you everything you’ll need to make a smart buying decision. Includes fabric swatches, our uniquely formulated clear vinyl, top track, fastening stud, and brochure. The cost of your Sample Kit will be deducted from your product order when you are ready to move forward.
Yes! With proper care, including properly securing and rolling up your enclosure, you can keep it up year-round.
In the fall and spring, you will likely be using your enclosure more often. These are good times to polish your enclosure as it will keep debris from sticking and provide a nice shine and reduce the need to wash your enclosure prior to rolling. Things to keep in mind:
- When rolling up your enclosure it is always a good idea to start by hand rolling, especially if it will be up for an extended period of time. This will help reduce wrinkling the next time your enclosure is rolled down.
- Be sure your curtains are properly fastened in the down position. One way to destroy your enclosure is to roll your system down and then forget to fasten it in heavy winds.
- When sustained winds above 50-60 MPH are expected (hurricane is in the forecast), your system should be rolled entirely up – with all panels up.
- If you plan on keeping your system down for the winter, you should lower all panels before temperatures drop below 54 degrees. Once temperatures drop lower, you may have additional difficulty fastening your enclosure and you may have to spend much longer than you had hoped to do so.
- Avoid rolling up curtains with clear vinyl when temperatures are below freezing. While the clear vinyl has been tested to withstand flexing in sub-zero temperatures, rolling in the cold may reduce the longevity of your clear vinyl, and fastening may prove difficult.
Built-In Fabric Protection (No Need for Valences)
We suggest a minimum of 12″ at the top of each panel, so when your curtains are rolled up the clear vinyl is covered (encased) by the fabric. This will protect the rolled clear portion from UV refraction. The product has been rigorously tested to withstand UV and heat, but when rolled up refraction may cause the roll to superheat and decrease the life of your PES.
This also protects the clear portion of your panel from sitting on the lines and creating unnecessary creasing or abrasion to your clear vinyl.
Here is a video demonstration of how the attachment points are installed:
Video above shows the installation of our standard hardware. By marking the snap and pushing it against the attachment point this will leave a mark on the post to that the screw will be installed into.
When installing the track and zipper system you will mount your track flush with the inside edge of the attachment post. We recommend putting screws 1″ from the top and bottom and spaced out about every foot. If more screws are needed extra support screws are sent out with the hardware kit
When attatching to Brick/Concrete/Rock: PES reccomends using tap con screws. PES WILL NOT provide these and will need to be sourced at a local hardware store.
When attaching to wood: The hardware kit will include everything needed to install when attaching to wood. Screws are self drilling so predrilling holes is not required.
When attaching to Metal: When attaching to metal you made to predrill the metal depending on the thickness of the metal, The screws sent are not designed for drilling through thick steal. PES WILL NOT provide self drilling metal screws and recommends sourcing this at a local hardware store.
PES will make curtains custom for whatever you desire. This being said we DO NOT recommend rotating the glass vertically due to the load that is put on the curtain while the clear vinyl is rotated. This will change the pricing on the system depending on the size of the curtain. Rotating the clear vinyl only allows for 53″ width so any curtain over this width will need extra clear vinyl to make up the width which will also add to the cost of the system.

The PES works with all screen systems. PES curtains are intended to cover screened areas of the porch in order to enclose the space. PES will work with any of the leading screen systems
This center opening is enclosed with 3 panels, with a door panel in the middle. Simply roll up the door panel and the side panels remain securely attached to the floor.
Rather than enclosing an extra wide opening with a single roll-up panel, we often split the opening with two curtains that zip together. Below the zipper, is a floor mount (pictured below) can be used to add rigidity to your system and allow the panels to zip up independently. For example, if you have a 140” wide opening, we can split that into two 70” curtains that will zip together in the middle and attach to the floor securely to the floor with a quarter turn fastener. Other options include adding a seasonal post, so rather than using a zipper, the curtains attach along the vertical post for a nice secure fit.

There are no minimum or maximum on heights and widths for your PES panels. We can build any size you would like, however, once curtains get wider than 10-12 feet they can become difficult to roll up or even secure in windy conditions. They may require assistance to properly roll-up and secure. If you plan to roll your curtains up and down more frequently we do suggest splitting your larger opening into two smaller curtains that zip together.

The PES can be installed to stucco but PES WILL NOT provide the screws for this and will need to be sourced by the customer. We recommend using the Blue tap con screws with at least an 1.5 Inch length
We make these as fixed panels with high quality clear vinyl and a 2” fabric border or as solid fabric. These panels don’t roll up and are taken down and stored away when not in use. Our team will work with you to get the measurements we need to cover and attach to irregularly shaped openings.
All of PES curtains are made custom to your needs. PES can build curtains up to any size. We are limited to the 53″ for clear vinyl but the rest of the height will be made up with fabric
The diameter of the roll is 5-7 inches for an 8″ foot roll-up curtain. However, the bottom of the rolled curtain will hang about 5.5 to 6 inches from the top of the track that attaches to your porch or patio. Below are a couple of example photos.
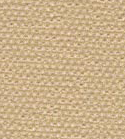
Enclosure curtain, in the color hemp beige, rolled up on the outside of screened porch.
Enclosure curtains rolled up on the left.
- Covered outdoor structure (such as pavilion, gazebo, patio, deck or porch)
- Any number of sides
- Three attachment points for each panel:
- Top of your opening: for an outside install, track is typically mounted under an eave. Inside install, above opening. Please note the keder track is a 1 1/4″ wide piece of PVC or aluminum and the diameter of most panels is 3 1/2″ – 4″ when rolled up. More information: https://www.porchenclosuresystems.com/view/
- Along 2 vertical supports: our low-profile, self-locking fasteners are placed at an aesthetically-pleasing spacing along your vertical supports, on the left and right hand sides of each panel.
- No floor attachments are necessary in a standard PES solution. We weight down each panel with a galvanized steel roll bar, which adds rigidity to the panel. The roll bar is stitched into the fabric and, with a low-profile fastener just above it on the vertical support, is enough to keep panels down in most cases.
- Panels no wider than 150″. Wider than this makes rolling up by 1 person cumbersome. If your vertical supports are spaced wider than 130″, we can create wider panels that zip together and use a floor mount. Please note that zippers with floor mount are not as wind-resistant as attaching to structural vertical supports.
Please note with PES, you are ordering direct from the manufacturer. For customers local to our production facility in Dover Delaware we begin to charge for travel. PES installation is either a simple half-day DIY project for our out-of-area customers, and others hire a local handyman to help out.
Since we do not recommend rolling the clear vinyl sheet glass in your PES at temperatures below freezing to protect longevity of your PES, our customers enclosing open spaces (patios, pavilions, decks) typically need to provide egress options for their space once enclosed. We like to see customers continue to use their outdoor space as it was constructed/intended. We recommend either of these 2 options:
- Option 1: Create a narrower rolling panel using all-fabric. This will allow you to raise & lower that panel in any temperature and continue to use no matter the weather.
- Option 2: Add a zippered opening to your rolling panel. This entails adding the zippers pictured below to a standard PES rolling panel. You will have to step over the roll bar stitched into the bottom of your panel, so not ideal for every configuration. This option allows you to have both a clear view and egress.(If you haven’t already, please take the time to get familiar with our standard solution components here: https://www.porchenclosuresystems.com/view/)
The photos below show Option 2, the zippered opening option.


Here is Option 1, the all-fabric rolling panel option:

